No-Bake Yogurt Tart
Introduction
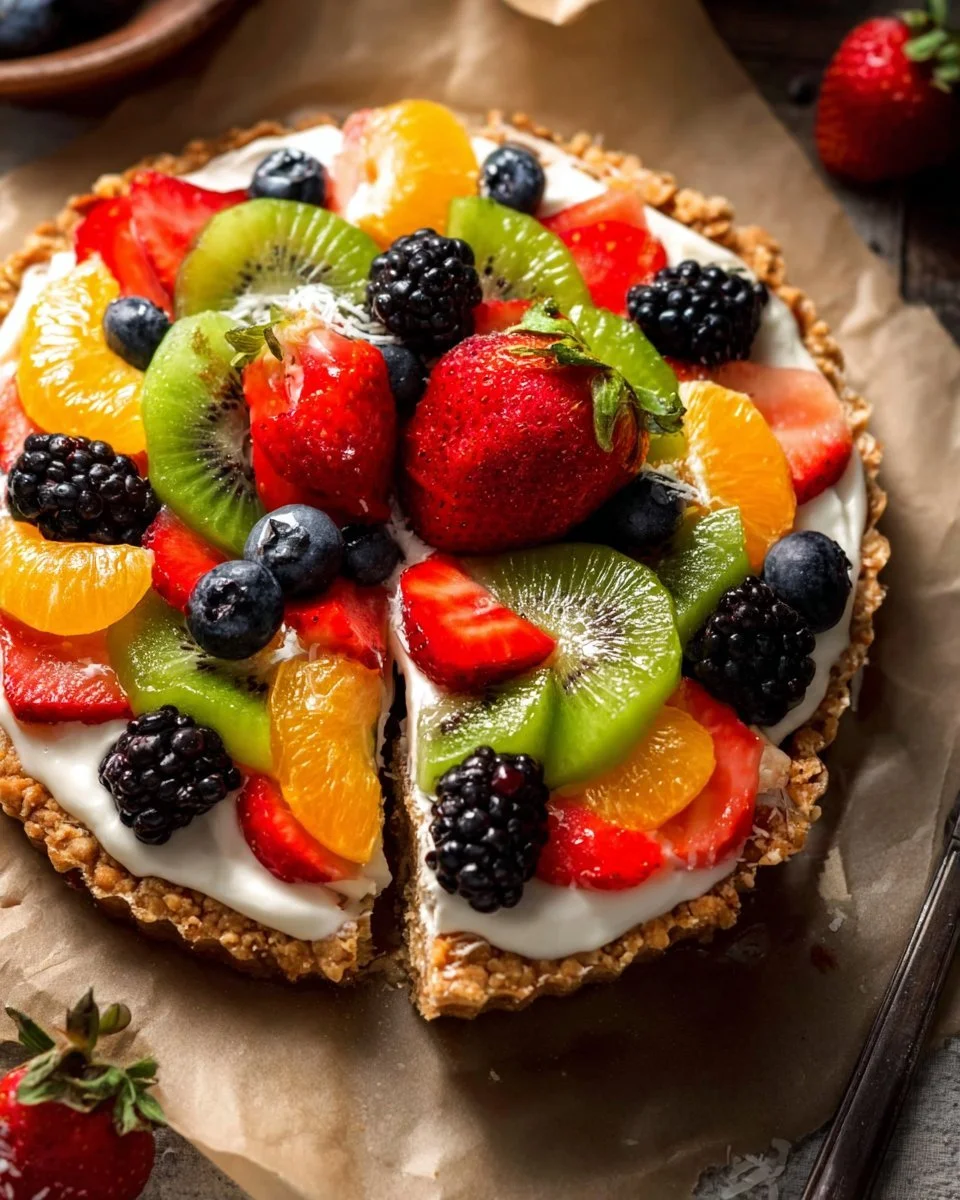
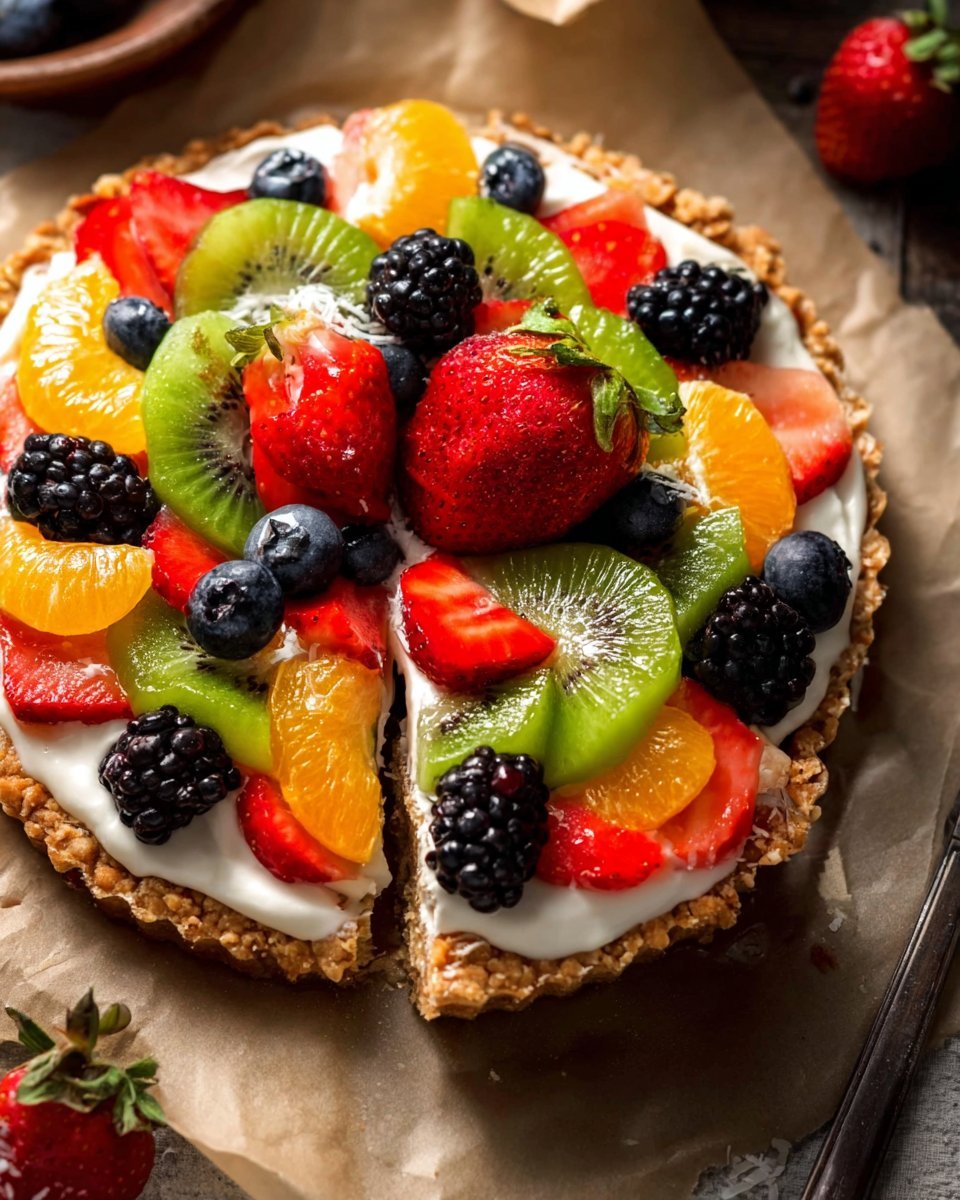
This No-Bake Yogurt Tart is a light, refreshing dessert that blends a chewy date-and-nut crust with creamy Greek yogurt and bright fresh fruit. The crust has a pleasantly sticky, slightly sweet flavor from Medjool dates, and a satisfying nutty crunch from cashews and almonds. The filling is cool and tangy, with a silky texture that contrasts nicely with the dense crust. Fragrant fresh fruit on top adds bursts of acidity and color, and a thin apricot glaze gives a glossy finish when you want it. It is ideal for warm-weather gatherings, brunch, or any time you want a simple dessert that feels elegant without turning on the oven. If you enjoy easy, no-bake sweets, you might also like my take on brown sugar pop tart cookies with a flaky twist, or a different spin on pop tart cookies in this brown sugar pop tart cookies recipe.
Ingredients
- 15 pitted Medjool dates, These are soft and naturally sweet, perfect for binding the crust.
- 3/4 cup unsalted cashews, Adds creaminess and a mild, buttery flavor to the crust.
- 3/4 cup unsalted almonds, Contributes crunch and a toasty note; whole nuts make the crust heartier.
- 1 cup Greek yogurt, Use plain Greek yogurt for tang and thick, creamy texture.
- Assorted sliced fresh fruit (optional for topping), Any seasonal fruit works well for color and freshness.
- 2 Tablespoons apricot preserves (optional), A small amount warmed into a glaze gives the fruit shine and extra sweetness.
- 1 Tablespoon water (optional), Thin the apricot preserves slightly so it brushes smoothly over fruit.
Step-by-Step Instructions
- Prepare the tart pan. Spray the bottom of a 9-inch tart pan with nonstick spray and line with parchment paper. This makes removal easy and keeps the crust intact.
- Soak the dates. Soak the dates in warm water for 10 minutes, then drain and cut them in half. Soaking softens the dates and helps them blend into a sticky dough.
- Make the crust. In a food processor, pulse the dates, cashews, and almonds until a sticky "dough" forms. Stop and scrape the sides as needed to ensure even processing.
- Press the crust. Press the "dough" evenly into the prepared tart pan, pressing firmly. Use the bottom of a measuring cup or glass to compact the crust for a smooth surface.
- Add the yogurt. Spread the yogurt on top of the crust and decorate with fresh fruit. Spread gently so the crust does not shift.
- Glaze the fruit, if desired. If desired, mix apricot preserves with water and brush over the fruit. Warm the preserves slightly to make them easier to thin and brush.
- Serve or chill. Slice and serve immediately, or refrigerate for up to 1 day. Chilling for 15 to 30 minutes can help the tart hold its shape.
Recipe Details
- Prep Time: 20 minutes
- Cook Time: 0 minutes
- Total Time: 20 minutes
- Servings: 8
- Calories: about 300 kcal per serving (approximate)
Tips, Storage & Variations
- Tip: Pulse the nuts until you have a mix of fine crumbs and small bits for the best crust texture. Overprocessing into a paste can make the crust greasy.
- Tip: If the dates are very dry, increase soaking time by a few minutes so they form a sticky dough.
- Storage: Store the assembled tart covered in the refrigerator for up to 24 hours. The crust softens over time but remains tasty.
- Freezing: You can freeze slices wrapped tightly for up to 1 month. Thaw in the refrigerator before serving and add fresh fruit just before serving for best texture.
- Variations using only existing ingredients: Top with a single fruit type for a minimalist look, or combine several fruits for a colorful arrangement. Skip the apricot glaze for a more rustic finish, or brush the glaze only on half the tart to compare textures. For a nuttier crust, pulse the cashews slightly finer and leave larger almond pieces for bite.
Frequently Asked Questions
-
Can I make the crust ahead of time?
Yes. Make the crust up to one day ahead and keep it in the tart pan covered in the refrigerator. -
Do I need to remove the tart from the pan to serve?
No. You can slice and serve directly from the tart pan, or remove the outer ring for a cleaner presentation. -
Can I use regular dates instead of Medjool?
You can, but Medjool dates are softer and sweeter, which helps the crust bind without extra sweetener. -
Is it possible to use flavored yogurt?
Yes. A mild, plain or vanilla Greek yogurt works best to let the fruit shine, but flavored yogurt can be used to add a different note. -
Will the crust hold together without nuts?
No. The nuts help give structure and texture. Removing them would change the recipe significantly.
People Also Ask
-
How long should I soak Medjool dates before blending?
About 10 minutes in warm water is usually enough to soften them for easy processing. -
Can I make a larger tart with this recipe?
This recipe is sized for a 9-inch tart pan. To make a larger tart, increase ingredient amounts proportionally. -
What fruits work best as toppings?
Berries, kiwi, peaches, and thinly sliced apples or pears all work nicely for color and balance. -
Should I strain yogurt to make it thicker?
If your yogurt is very loose, place it in a fine sieve or cheesecloth for 15 to 30 minutes to thicken, but full-fat or strained Greek yogurt is ideal as-is. -
How do I keep fruit from browning?
Brush sliced fruit lightly with the apricot preserves glaze to slow browning and add shine. -
Can I make mini tarts with this recipe?
Yes. Divide the crust mixture among small tart pans and assemble the same way for individual servings.
Conclusion
This No-Bake Yogurt Tart is an easy, elegant dessert that comes together quickly and showcases fresh fruit and wholesome ingredients. If you want more inspiration for Greek yogurt fruit tarts, check this recipe for a similar idea at No-Bake Greek Yogurt Fruit Tart – Sally’s Baking Addiction, or try another version at No-Bake Greek Yogurt Tart Recipe – Cookie and Kate. I hope you try this tart soon and share how you top it for guests and family. Enjoy a cozy slice and happy baking.