Easter Bunny Button Cookies
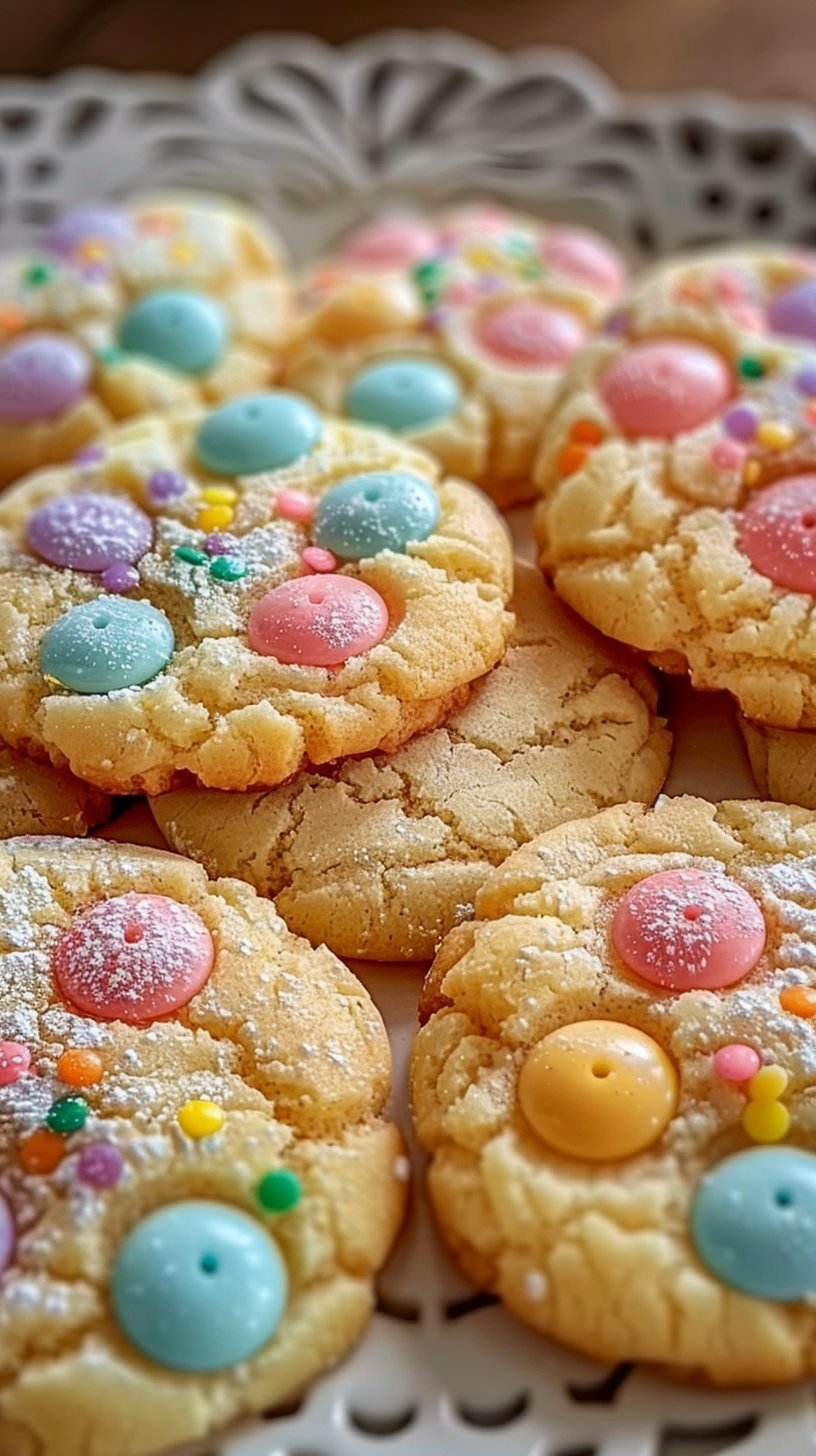
These Easter Bunny Button Cookies are a cheerful, simple cookie that brings a touch of spring to any gathering. Soft, buttery dough forms a tender, slightly crisp-edged cookie that melts in your mouth, while the pastel buttons add a playful crunch and pop of color. The aroma is classic and comforting, with warm vanilla and baked butter filling your kitchen as the cookies bake. These cookies are ideal for Easter baskets, classroom parties, brunch spreads, or a festive family baking session with children. They are easy enough for beginner bakers yet charming enough to impress guests. Dust with powdered sugar for a delicate finish, or leave them bright and candy-speckled as a cheerful snack. Make a double batch to share, or package a dozen as a thoughtful, homemade gift.
Ingredients
-
1 cup unsalted butter, softened
Provides rich flavor and tender texture; bring to room temperature for easy creaming. -
3/4 cup granulated sugar
Sweetens the cookies and helps with lightness when creamed with butter. -
1 large egg
Binds the dough and adds structure; use a room temperature egg for smoother mixing. -
1 teaspoon vanilla extract
Adds warm, aromatic flavor; measure carefully for best balance. -
2 1/2 cups all-purpose flour
The main structure of the cookie; spoon and level for accurate measurement. -
1/2 teaspoon baking powder
Gives a gentle lift so cookies are tender rather than dense. -
1/4 teaspoon salt
Enhances flavor and balances sweetness. -
Assorted pastel-colored buttons or candy-coated chocolates for decoration
Adds color and crunch; press five onto each cookie as directed. -
Powdered sugar for dusting (optional)
A light dusting gives a soft, festive finish if desired.
Step-by-step Instructions
-
Preheat the oven to 350°F (175°C) and line a baking sheet with parchment paper. This prevents sticking and helps cookies bake evenly.
-
In a large bowl, cream together the softened butter and granulated sugar until light and fluffy. Beat for about 2 to 3 minutes. Scrape the bowl sides once to ensure even mixing.
-
Beat in the egg and vanilla extract until well combined. Mix until smooth, scraping the bowl once. Do not overbeat.
-
In a separate bowl, whisk together the all-purpose flour, baking powder, and salt. Whisking helps distribute the leavening and salt evenly.
-
Gradually add the dry ingredients to the wet ingredients, mixing until a dough forms. Do not overmix; stop once no streaks of flour remain.
-
Roll the dough into 1-inch balls and place them on the prepared baking sheet, spacing them about 2 inches apart. For uniform cookies, use a small scoop or measure by eye.
-
Gently press five buttons or candy-coated chocolates onto the top of each dough ball. Press lightly so candies stay on but the dough still rises around them.
-
Bake in the preheated oven for 10 to 12 minutes, or until the edges are lightly golden. Center may still look slightly soft; that is fine.
-
Allow the cookies to cool on the baking sheet for 5 minutes before transferring them to a wire rack. This helps them set and prevents breakage.
-
Dust with powdered sugar before serving if desired. Serve once cooled to your liking.
Recipe Details
- Prep Time: 15 minutes
- Cook Time: 10 to 12 minutes
- Total Time: 32 minutes
- Servings: about 36 cookies
- Calories: approximately 115 kcal per cookie
Tips, Storage & Variations
-
Tips
- Use room temperature butter and egg for smoother creaming and a more even dough.
- For even-sized cookies, use a 1-inch scoop or a tablespoon to roll the dough.
- If your kitchen is warm, briefly chill the dough 10 minutes before rolling to make it easier to handle.
-
Storage
- Store cooled cookies in an airtight container at room temperature for up to 4 days.
- To keep decorations intact, separate layers with parchment paper.
- For longer storage, freeze baked cookies in a single layer on a tray until firm, then transfer to a freezer bag for up to 2 months.
-
Freezing the dough
- Roll dough into balls and freeze on a tray until solid, then store in a freezer bag. Bake from frozen, adding 1 to 2 minutes to the bake time.
-
Flavor variations using existing ingredients only
- Extra-vanilla: Increase the vanilla to 1 1/2 teaspoons for a more pronounced vanilla aroma.
- Powdered finish: Dust more generously with powdered sugar for a sweeter, softer exterior.
- Button patterns: Arrange the pastel buttons in a circle, bunny face, or other simple pattern for variety without changing the recipe.
Frequently Asked Questions
-
How long do these cookies stay fresh?
Cookies stored in an airtight container at room temperature stay fresh up to 4 days. -
Can I use salted butter instead of unsalted?
Yes, use salted butter but reduce added salt accordingly or omit the 1/4 teaspoon if you prefer less salt. -
Do I need to chill the dough before baking?
Chilling is optional. A short 10 minute chill can make the dough easier to handle but is not required. -
How many candies should I press on each cookie?
Press five pastel buttons or candy-coated chocolates onto each dough ball, as directed. -
Will these cookies spread a lot while baking?
They spread minimally; spacing cookies 2 inches apart prevents them from touching as they bake. -
Can I dust the cookies with powdered sugar after baking?
Yes, dusting with powdered sugar is optional and adds a soft, festive finish.
People Also Ask
-
What is the best way to soften butter quickly?
Cut butter into small cubes and let sit at room temperature for 15 to 30 minutes. -
Can I make these cookies without an electric mixer?
Yes, you can cream butter and sugar by hand with a sturdy spoon, though it takes more effort. -
Why are my cookies dry or crumbly?
Overmixing or using too much flour can cause dryness. Mix until just combined and measure flour by spooning into the cup and leveling. -
How do I prevent candy colors from bleeding?
Press candies gently into the dough and avoid overcrowding. Baking at the right temperature helps limit melting. -
Are these cookies good for kids to decorate?
Yes, they are a great activity for kids because decorating with buttons is simple and fun. -
Can I double the recipe for a larger batch?
Yes, doubling ingredients works well; bake on multiple sheets and rotate pans for even baking. -
What type of buttons work best?
Use small, pastel-colored candy-coated chocolates or buttons with a firm shell so they hold their shape when baked. -
Should I cool cookies completely before storing?
Let them cool to room temperature to avoid trapping steam, which can make cookies soft or soggy.
Conclusion
These Easter Bunny Button Cookies are an easy, joyful way to celebrate spring and bring a smile to family and friends. If you want inspiration for presentation or variations, see this playful take on the idea at Easter Bunny Button Cookies – Lord Byron’s Kitchen, and for another fun reference, check out the classic version at Easter Bunny Cookies – Like Mother, Like Daughter. Try the recipe, share your decorated cookies, and enjoy a cozy, colorful treat with loved ones.