
Fruity Pebbles Cheesecake Tacos: A Fun Twist on Dessert
Are you ready to transform your dessert game with a playful and vibrant creation that’s sure to delight both kids and adults? Introducing Fruity Pebbles Cheesecake Tacos! These colorful cheesecake-filled tacos are not just eye-catching; they’re bursting with flavor and texture that will make your taste buds sing. Imagine a crisp taco shell, sweet and creamy cheesecake filling, and the unmistakable crunch of Fruity Pebbles, all in one delicious bite. Perfect for family gatherings, birthday parties, or just a fun weeknight treat, these tacos are bound to steal the show. So gather your ingredients and let’s dive into this fun and tasty adventure!
Understanding Fruity Pebbles Cheesecake Tacos
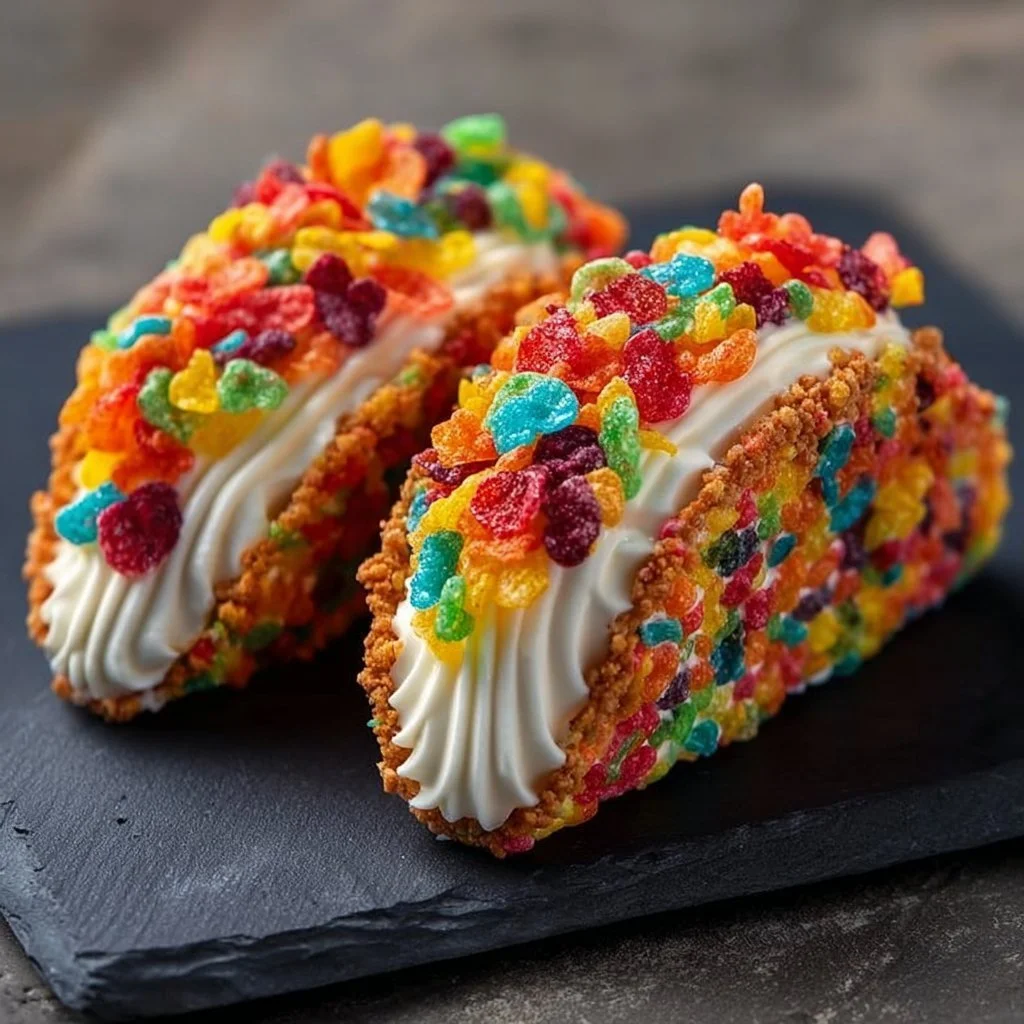
Fruity Pebbles Cheesecake Tacos combine the whimsical spirit of childhood cereal with the creamy yumminess of cheesecake, creating a dessert that feels both nostalgic and fresh. Originating simply as a dessert idea, this quirky twist has taken off in popularity, especially among families looking to bring a touch of fun to their dinner table. These tacos offer a delightful blend of textures—crunchy, creamy, and sweet—that truly makes them irresistible. Traditionally served cold, they shine during summer barbecues or as a special treat at birthday parties, making everyone feel like a kid again with each colorful bite.
What sets these Fruity Pebbles Cheesecake Tacos apart is their versatility. Whether you whip them up for a casual weeknight dessert or a fancy gathering, they’re sure to impress. Plus, making them can be a fun family activity, where everyone gets involved in creating their unique taco masterpiece. Whether you’re a beginner or an experienced cook, this recipe utilizes simple ingredients that come together quickly, letting you enjoy the process as much as the result.
Why You’ll Love This Recipe
This Fruity Pebbles Cheesecake Tacos recipe is a treat you won’t want to miss. Not only do they taste spectacular, but they also bring joy and a touch of creativity to the table.
- Ease of preparation: With straightforward ingredients and a simple assembly process, this recipe is ideal even for novice cooks.
- Flavor complexity: The combination of the creamy cheesecake filling with the crunchy, sugary Fruity Pebbles creates a delightful contrast that keeps every bite interesting.
- Family-friendly or kid-approved: Kids love the colorful cereal, and the fun presentation of tacos makes this dessert irresistible for any child (or adult!) who enjoys a playful meal.
- Budget-friendly or ingredient flexibility: Most ingredients are pantry staples or easy to find, so you won’t break the bank. Plus, you can easily substitute flavors to suit your preferences.
Your Guide to Making Fruity Pebbles Cheesecake Tacos at Home
Creating Fruity Pebbles Cheesecake Tacos is an enjoyable experience that boasts a prep time of just 30 minutes, plus a bit of chill time. You’ll only need a few key tools: a mixing bowl, a mixer (hand or stand), and a baking sheet for the taco shells. To get started, gather your favorite ingredients, and let’s get cooking.
Ingredients
-
For the Taco Shells:
- Flour Tortillas: These will be the base for your tacos. They provide a soft yet sturdy shell. You can also use mini ones for smaller treats!
- Butter: Helps the tortillas hold their shape and adds a buttery flavor.
-
For the Cheesecake Filling:
- Cream Cheese: The star ingredient for a rich, creamy filling. Make sure it’s at room temperature for easy mixing.
- Powdered Sugar: Adds sweetness and helps achieve a smooth texture.
- Vanilla Extract: Infuses the filling with a warm, sweet aroma.
-
For Topping:
- Fruity Pebbles Cereal: Provides crunch and a fun burst of color.
- Whipped Cream: Optional, for extra lusciousness and decoration.
Directions
-
Prepare the Taco Shells: Preheat your oven to 350°F (175°C). Brush each tortilla lightly with melted butter. Place the tortillas over the inverted cups on a baking tray, creating a taco shell shape. Bake for about 10 minutes or until golden and slightly crispy. Make sure to keep an eye on them to prevent burning.
-
Make the Cheesecake Filling: In a mixing bowl, beat 8 oz of softened cream cheese until smooth. Gradually add 1 cup of powdered sugar and 1 tsp of vanilla extract, mixing until well combined and creamy. This should take about 2-3 minutes.
-
Assemble the Tacos: Once your taco shells are cool, use a piping bag or a spoon to fill them with the cheesecake mixture generously. Add as much or as little as you like!
-
Add Fruity Pebbles: Sprinkle a generous layer of Fruity Pebbles on top of the cheesecake filling in each taco. Don’t be shy; the more, the merrier!
-
Chill: Place the assembled tacos in the refrigerator for about 30 minutes to set the filling slightly. This also allows the flavors to mingle beautifully.
-
Serve: Just before serving, add a dollop of whipped cream on top if desired. Arrange them on a serving platter for a vibrant presentation.
-
Enjoy: Dig in and savor the delightful crunch of the Fruity Pebbles against the creamy cheesecake. Each bite is a delicious explosion of flavors and textures!
Serving Ideas for Fruity Pebbles Cheesecake Tacos
Fruity Pebbles Cheesecake Tacos are incredibly versatile and can be served in various delightful ways. Their vibrant colors make them visually appealing at any gathering, and they serve as a conversation starter!
- With Fresh Fruit: Pairing these tacos with fresh strawberries or blueberries can enhance the sweetness while balancing the richness of the cheesecake.
- Alongside Ice Cream: Serving with a scoop of vanilla or strawberry ice cream creates a deliciously cold contrast.
- Complimentary Drinks: A side of lemonade or fruit punch adds a refreshing element that works beautifully with the sweetness of the tacos.
Pro Tips for the Best Fruity Pebbles Cheesecake Tacos
Getting these tacos just right involves a few simple techniques that can make all the difference, ensuring every bite is as delicious as possible.
- Ingredient Swaps: Use dairy-free cream cheese for a vegan version or substitute the dairy tortillas with corn tortillas for a gluten-free option.
- Spice Adjustments: For a twist, add a pinch of cinnamon or a splash of almond extract to the cheesecake filling for added flavor depth.
- Equipment Advice: If you don’t have a piping bag, a zipper bag with the corner cut off works just as well for a clean fill.
- Storage Tips: These tacos can be stored in an airtight container for up to two days; however, the shells may soften over time.
- Mistakes to Avoid: Ensure the cream cheese is softened for easy mixing and achieving a smooth filling; using cold cream cheese could lead to lumps.
Optional Section: Variations & Add-Ins
Feeling adventurous? Here are a few tasty variations you can try with your Fruity Pebbles Cheesecake Tacos:
- Chocolate Twist: Mix in some cocoa powder to the cheesecake filling for a chocolatey delight. Finish with crushed chocolate cookies for added crunch.
- Tropical Flair: Swap the Fruity Pebbles for toasted coconut and pineapple chunks to create a tropical-themed dessert.
- Nutty Addition: Add a tablespoon of almond butter to the filling for a nutty flavor, and top with sliced almonds.
Kid-Friendly Version
When making these Fruity Pebbles Cheesecake Tacos for kids, consider their preferences! Opt for less sweetness by reducing the sugar in the filling, or try adding in some fun food coloring to the cream cheese for a playful, colorful filling. Allowing kids to help fill their tacos may also encourage them to try new flavors!
Storing and Reheating Tips
When it comes to storage, these tasty tacos are best enjoyed fresh, but they can be kept in an airtight container in the refrigerator for up to two days. It’s recommended to store the taco shells and filling separately to keep the shells from getting soggy. Remember to use a container that is both airtight and moisture-proof to help maintain the quality of your dessert.
If you’re planning to make these ahead of time for an event, you can prepare the taco shells and filling a day in advance, just waiting to assemble before serving. They are less suited for freezing due to the cheesecake texture, but if you do, ensure they are well-wrapped to prevent freezer burn. Simply thaw in the refrigerator when ready to use.
FAQs
1. Can I prepare these tacos in advance?
Absolutely! You can prepare the taco shells and the cheesecake filling a day ahead. However, it’s best to assemble them the day of serving to keep the shells crispy.
2. Can I use a different type of cereal?
Yes! Feel free to get creative with your choice of cereal. Just keep in mind that the texture and flavor will change based on your selection.
3. How do I keep the tacos crispy?
To maintain that lovely crunch, store the taco shells separately from the filling. Assemble just before serving whenever possible.
4. Can I make these gluten-free?
Yes! You can easily make the tacos gluten-free by using gluten-free tortillas and checking that the cream cheese and toppings comply.
5. What’s the best way to store leftovers?
Leftovers should be stored in an airtight container in the refrigerator for up to two days. For the best quality, keep fillings and shells separate until ready to eat.
Conclusion
Fruity Pebbles Cheesecake Tacos bring together fun, flavor, and a bit of whimsy, making them a delightful dessert for any occasion. With their vibrant colors and playful presentation, they’re bound to bring smiles to your family and friends. This recipe is easy to follow and can be customized to suit your taste, providing endless possibilities in the kitchen. Go ahead and try it tonight, and let me know how it turned out!